Last Saturday (13th July) was fun. I finally attempted
Smita’s Rainbow Cake. It turned out to be 4/5 on looks and 3/5 in
taste.
Frankly, during weekends, till afternoon we hardly get
anything done except breakfast. We get up at the same time as on a Weekday but
both the maids turn up a little later than usual, sometimes hubby takes little
one for a stroll, sometimes they do errands for impromptu breakfast plans, and
so on and so forth. Something or the other takes away the entire first
half.
 Last Saturday afternoon, after we put sonny boy for a nap,
we settled down to enjoy Pune’s awesome weather with a cup of tea. I finally
indulged in some reading and hubby did some internet surfing. It was how the
Saturdays should be, leisurely.
But the highlight of the day was certainly the cakes. Hubby
does not eat non veg (including eggs) on Saturday, so I decide to make a little
eggless cake and a bigger cake with egg. Actually, it was I, who
had started this whole practice of not eating non-veg on certain days, then
hubby joined in for Saturday. I don’t follow that too strictly anymore because
we don’t follow it for our son, and I usually end up eating whatever he refuses
to eat. He will get all excited about egg, almost force me to boil the egg, and
then completely refuse to have it. What is a mother to do!
Anyways, so I got all the ingredients to make the rainbow
cake which was supposed to be a practice session for little one’s birthday. We
have stopped getting cakes from outside. Nobody likes them at our home and we
prefer giving home-made stuff to our son, so now we bake our own cakes for big
occasions.
 Hubby had got an interesting mould while getting the ingredients. It has all
the insects like butterfly, bee, dragonfly etc. If somebody really took an
effort to do a nice icing and paint it like the insects, they will look like
the real ones. But I would do so much hardwork only when my son is old enough
to realize how much effort has gone in making those cakes look like insects. I
used this mould to bake the eggless cake. Hubby used 2 colours to get some
effect. I followed this
recipe at Smita’s blog.
For the Rainbow cake also, I have referred everything as per Smita,
the only difference is that instead of Curd, I added eggs.
Here’s how I did it.
Ingredients:
Flour (maida): 1 and 1/2 cups (200 gms)
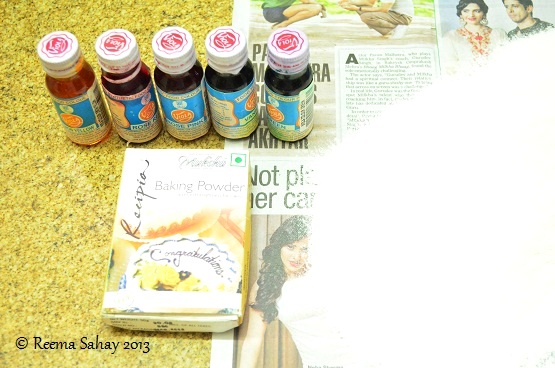
Eggs: 3 (I used 4 eggs but I felt that the batter was more
on the liquid side and also the effect of eggs and baking powder was a little
on higher side)
Sugar: 1 cup
Baking soda: 1/2 tsp
Baking powder: 1 and 1/4 tsp
Cooking oil or Butter: 1/2 cup
Vanilla essence: 1 and 1/2 tsp
Colors: Pink, Green, Yellow, Orange (Pink+Yellow)
Note: Take more colors if you can get like Blue and its
combinations with other colors like Purple.
Method:
 |
| Step 2 |
- Seive Maida and keep aside
- Mix crushed sugar and egg till the batter is smooth. Add Baking Powder and Baking Soda. Mix well.
- When you find bubbles appearing in it, add oil and vanilla essence, and beat well.
- Add
Maida slowly to the mixture so that there are no lumps. The better you mix
this batter, the better the cake will be. After mixing it with hand, I
also used a blender to mix it evenly.

Step 5 - Pour the batter equally in separate bowls according to the number of colours you have. You can keep one for without colour as well, like I did. Add colour in each bowl. So, for me, there were 5 colours to work with.
- Preheat the microwave in the convection mode at 180 deg
- Grease
the mould with oil.

Step 8 - Put same-sized spoons (the bigger the better) in each bowl. Here is a trick, the bigger the spoon, the thicker layers of colour you will get. Now start pouring each colour batter one by one at the centre of the mould. You just have to keep putting the colours one by one at the centre and the batter will automatically take shape.
- Bake
it at 180 degrees (in convection) for 30-40

Step 9


minutes. Insert a pin or knife in the cake to check if the
cake is cooked from inside. If you find any stickiness, bake a little more.
When nothing sticks to the knife, it means the cake is done.
I had got the material for icing too, but I had lost all
energy so I gave it a miss.
So, how does it look? I couldn't get over its prettiness
:-)


