Showing posts with label reluctant cook. Show all posts

Monday, July 29, 2013

Simple and easy-to-make Pasta in White Sauce [UBC Post 23]

What do you do when you want to cook something new, and are looking for a simple and easy to cook recipe? Google obviously!

One of the Saturdays, we decided to make Pasta at home. I love pasta in white sauce. One reason is I love anything with cheese, the second reason is that it is bland enough for a toddler (not to say that he does not eat the normal food we cook. He tastes everything that we eat but if he finds them spicy, I don’t force).

This is how my White Sauce Pasta looked finally
I referred this recipe to make Pasta. I found this recipe very simple and easy to follow.I am more-or-less reproducing the recipe here with minor modifications.

A. FOR COOKING PASTA:
Ingredients:
Pasta: 1 and half cups
Oil: 1 tsp
Salt: To Taste
Method: 
Put water to boil in a container (enough to soak the pasta and more). Add some salt and ½ tsp oil. The oil will avoid Pasta from sticking. When the water starts boiling, add Pasta to it. Cook the Pasta till it is soft but firm. Drain the hot water and immediately add cold water to it. Remove the cooked water from the water and add ½ tsp oil to it.

B. PREPARING THE VEGETABLES:
Ingredients:
Olive oil: 1 tbsp
Garlic: 1 tbsp (finely chopped)
Capsicum: 1 (chopped; remove the seeds)
Carrot: ½ (chopped)
Cauliflower: 1 cup ( blanched; put it in hot water with a little salt)
Pea: 1/3 cup
Sweet corn: 1/3 cup
Pepper powder: To taste
Salt: To taste
Oregano: To taste
Note: I cooked the vegetables with little water in Microwave for 2 minutes.
Method: 
Heat oil in a pan. Add garlic and sauté till golden. Then add all vegetables (capsicum, cauliflower, pea, carrot and corn). Cook uncovered for a while but do not overcook. Let the vegetables have a little crunchiness. Add salt, pepper powder and oregabo to taste.

C. PREPARATION OF WHITE SAUCE
Ingredients:
Butter: 11/2 Tbsp
Cornflour: 2 tbsp (you may use Maida if you don’t have cornflour)
Milk: 1 1/2 cup (boiled and cooled)
Cheese: 3-4 Tbsp
Salt: To Taste
Pepper powder: To Taste
Oregano: To Taste
Method: 
Melt butter in a pan, add cornflour while stirring continuously. Saute till it changes colour to slightly brownish. Add 1/2 cup of milk and stir continuously with a whisk to prevent formation of lumps. When it starts thickening, add the remaining milk gradually stirring continuously with the whisk. When it starts boiling, reduce the flame. Add cheese, salt, pepper powder and oregano to taste.
When it thickens slightly, remove from flame. (If it is too thick, you can add the water reserved while cooking pasta and heat again).This sauce will thicken as it cools, so mix it in between or a layer will form on the top.

D. COMBINING PASTA, VEGETABLES AND WHITE SAUCE
Mix all three in a pan, on a low flame. Top it with grated cheese and serve hot.

Monday, July 22, 2013

A rainy Saturday and a Rainbow Cake [UBC Post 17]

Last Saturday (13th July) was fun. I finally attempted Smita’s Rainbow Cake. It turned out to be 4/5 on looks and 3/5 in taste. 

Frankly, during weekends, till afternoon we hardly get anything done except breakfast. We get up at the same time as on a Weekday but both the maids turn up a little later than usual, sometimes hubby takes little one for a stroll, sometimes they do errands for impromptu breakfast plans, and so on and so forth. Something or the other takes away the entire first half. 

Last Saturday afternoon, after we put sonny boy for a nap, we settled down to enjoy Pune’s awesome weather with a cup of tea. I finally indulged in some reading and hubby did some internet surfing. It was how the Saturdays should be, leisurely.

But the highlight of the day was certainly the cakes. Hubby does not eat non veg (including eggs) on Saturday, so I decide to make a little eggless cake and a bigger cake with egg. Actually, it was I, who had started this whole practice of not eating non-veg on certain days, then hubby joined in for Saturday. I don’t follow that too strictly anymore because we don’t follow it for our son, and I usually end up eating whatever he refuses to eat. He will get all excited about egg, almost force me to boil the egg, and then completely refuse to have it. What is a mother to do!

Anyways, so I got all the ingredients to make the rainbow cake which was supposed to be a practice session for little one’s birthday. We have stopped getting cakes from outside. Nobody likes them at our home and we prefer giving home-made stuff to our son, so now we bake our own cakes for big occasions. 

Hubby had got an interesting mould while getting the ingredients. It has all the insects like butterfly, bee, dragonfly etc. If somebody really took an effort to do a nice icing and paint it like the insects, they will look like the real ones. But I would do so much hardwork only when my son is old enough to realize how much effort has gone in making those cakes look like insects. I used this mould to bake the eggless cake. Hubby used 2 colours to get some effect. I followed this recipe at Smita’s blog.

For the Rainbow cake also, I have referred everything as per Smita, the only difference is that instead of Curd, I added eggs.

Here’s how I did it.

Ingredients:

Flour (maida): 1 and 1/2 cups (200 gms)

Eggs: 3 (I used 4 eggs but I felt that the batter was more on the liquid side and also the effect of eggs and baking powder was a little on higher side)
Sugar: 1 cup
Baking soda: 1/2 tsp
Baking powder: 1 and 1/4 tsp
Cooking oil or Butter: 1/2 cup
Vanilla essence: 1 and 1/2 tsp
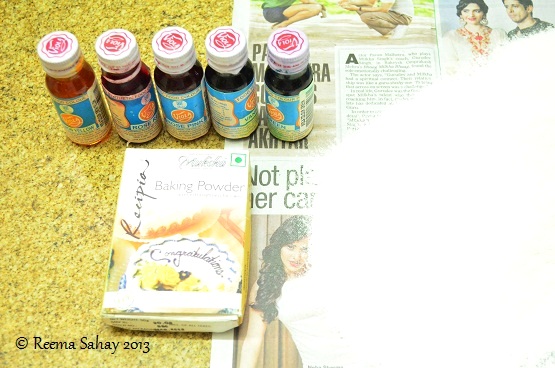
Colors: Pink, Green, Yellow, Orange (Pink+Yellow)
Note: Take more colors if you can get like Blue and its combinations with other colors like Purple.

Method:
Step 2
  1. Seive Maida and keep aside 
  2. Mix crushed sugar and egg till the batter is smooth. Add Baking Powder and Baking Soda. Mix well. 
  3. When you find bubbles appearing in it, add oil and vanilla essence, and beat well.
  4. Add Maida slowly to the mixture so that there are no lumps. The better you mix this batter, the better the cake will be. After mixing it with hand, I also used a
    blender to mix it evenly. 
    Step 5
  5. Pour the batter equally in separate bowls according to the number of colours you have. You can keep one for without colour as well, like I did. Add colour in each bowl. So, for me, there were 5 colours to work with. 
  6. Preheat the microwave in the convection mode at 180 deg 
  7. Grease the mould with oil. 
    Step 8
  8. Put same-sized spoons (the bigger the better) in each bowl. Here is a trick, the bigger the spoon, the thicker layers of colour you will get. Now start pouring each colour batter one by one at the centre of the mould. You just have to keep putting the colours one by one at the centre and the batter will automatically take shape. 
  9. Bake it at 180 degrees (in convection) for 30-40
    Step 9
minutes. Insert a pin or knife in the cake to check if the cake is cooked from inside. If you find any stickiness, bake a little more. When nothing sticks to the knife, it means the cake is done.

I had got the material for icing too, but I had lost all energy so I gave it a miss.

So, how does it look? I couldn't get over its prettiness :-)


Wednesday, July 03, 2013

The Reluctant Cook's Chocolate Cake outing [UBC Post 3]

I have often said that I am a Reluctant Cook. To cut the long story short, I don't enjoy cooking but I know how to cook. I even love doing it sometimes for the two most special people in my life - my husband and my son.

Cake is something which all of us love, and this is my son's birthday month. Though we love cake, I don't make it too often because it is laden with calories. But now since we are nearing the little one's birthday, I want to practice a little before making the Birthday Cake.

I was going to make Smita's Rainbow Cake (since I am planning to make that for my son's birthday), but my nephew (who is visiting) declared he loves chocolate cake. So, I thought, let me try that first. I sent a message to Smita to check on how much coco powder should I add for a 200 gm flour cake. She sent me a few website links to refer. I finally settled for this recipe on Gayathri's blog. Let me add what an awesome blog it is! I drooled for quite a while before setting on to the task at hand. 

I am reproducing her recipe with the minor modifications I did.

Recipe for the Eggless Chocolate Cake (without Milk, so Vegan too)


Ingredients:
Flour (Maida)-1 cup
Baking Powder-3 tsp (I put 2.5 tsp, but it has come out melts-in-your-mouth soft, I thought probably a tiny bit less would have been better)
Baking Soda - 3/4 tsp
Cocoa Powder - 1/3 cup (Next time I would put slightly less quantity of this as it turned out too chocolate for me)
Water -1/2 cup
Vanilla Essence - 1 tsp
Oil - 45 ml
Melted Butter - 45 ml
Castor Sugar (or powdered sugar) - 3/4 cup
[Note: You must refer her conversion chart because cups and spoons can really confuse sometimes]

Procedure:
1. In a bowl add melted butter, oil and sugar.
2. Whisk well until sugar dissolves.
3. Sift together flour, baking powder, baking soda and cocoa powder.
4. Add water to the butter mixture and whisk well. (I usually don't put the entire quantity at one go but eventually that much was needed)
5. Add the flour mixture and mix it gently using a wooden spoon.
6. Pour the batter into silicon moulds or a 7"cake tin.
7. Preheat oven to 160C.
8. Bake the cake for 15minutes if using small moulds and 25-35 minutes for a single tin.
9. Check with a tooth pick. When done transfer to wire rack and allow it to cool completely.
10. Serve and Enjoy.


You can see the end result in the pictures. I would not say it turned out perfectly but that is the thing with making dishes by referring recipes. You learn to perfect it after a few trials. It was strictly OK this time, but a few modifications will do it justice. You may hop on to Gayathri's blog for awesome recipes of cake. 

Friday, May 03, 2013

May Photo A Day : Day 3 : This is Really Good!

My picture for today is of Home Made Pizza.

I don't fancy cooking but once in a while I let the reluctant cook rein over me. (It also makes sense to give the little one home-made stuff as much as possible.) On one such occasion, we (my husband and I) decided to make Pizza at home.

We bought the Pizza base from a bakery near our place. With the help of Googleji, I made tomato-based spread, and sauteed onion, capsicum, mushroom and corn in olive oil.

All I will say is I am not planning to order Pizza from outside now. 
So, dear readers (viewers), is it "good" enough?